Showing posts with label The Sketchbook Projects. Show all posts

9.19.2010

My Sketchbook: Leopard

I am a huge fan of leopard print (as long as it isn't overdone or in crazy colors like lime green). Really I don't think it ever really goes out of style, but this season leopard seems to be a bigger trend then usual (totally makes me happy!!!). So, I thought I would add a little something to my wardrobe that could work with many different looks:


Here's my inspiration page from my sketchbook:

Materials Needed:
Fabric & Light to medium weight fusible interfacing (you will end up with 6 pieces, 3 of fabric, 3 interfacing, cut fabric and interfacing for each set of measurements)
waist* + 4 1/2"= the length and 4 1/2" for the width main belt piece (*for the waist measure for where you want to where the belt)
13" x 4 1/2" for the bow
4" x 3" for the middle of the bow
1 button 
coordinating thread

Step 1: Fuse the interfacing to the wrong side of fabric for all 3 pieces

Step 2: Take one of your pieces and gently fold lengthwise with right sides together. Sew the un-folded edge with a 1/2" seam allowance. Repeat with the remaining two pieces.

Step 3: Trim seam allowance to 1/4" on all pieces.

Step 4: Turn pieces right side out.

Step 5: Press all three pieces flat with seam centered along what will become the back of the belt.

Step 6: Take the main part of the belt and fold the raw edge over 1/2" press.

Step 7: Fold the edge another 1/2", press. Sew to secure the end. Set piece aside for now.

Step 8: Take the main bow piece and fold in half with right sides together and raw edges lined up together.

Step 9: Sew with a scant 1/4" seam allowance as shown below.

Step 10: Press seam allowance open.


Step 11: Center the seam along the back. (the seam will be hidden by the middle bow piece).

Step 12: Take your middle bow piece (placed right side down) and place the bow on top and centered with the top side of the main bow piece facing down. 

Step 13: Fold the top edge down, gently pinch the bow and fold the bottom edge up tucking the raw edge in. Hold together with your fingers. 

Step 14: Use a few pins to secure the bow. 

Step 15: Hand sew the middle of the bow along the back seam to secure. Set the bow aside.

Step 16: Try the belt on to measure the overlap.

Step 17: Use a pin to mark where the overlap ends.

Step 18: Divide the overlap into three areas and make 3 vertical buttonholes (I just used a buttonhole on my sewing machine and eyeballed where I wanted the buttonholes. This will allow you to adjust the belt according to the amount of layers you are wearing.) Attach the button to the wrong side of the belt. (again attached the button using my sewing machine following the manufacturer's instructions, and don't worry the stitching from the button that is on the right side will be covered up by the bow.)

Step 19: Put the belt on and hold the bow where desired and pin in place to the top layer of the belt.

note: I made sure to put the outside edge of the bow out enough to cover up the buttonholes if it was set on the largest size. 

Step 20: Hand sew the bow on to the belt. (I just attached the middle of the bow to the belt so the sides of the bow can stick out a little so you can easily see the bow.)

And now you have a fun new belt to add to you fall wardrobe!

9.10.2010

My Sketchbook: Red & Black

so (I am changing the name of The sketchbook projects to My Sketchbook, a little revision to a new thing- lol!) Alright, this week I focused on the Red & Black trend I am loving! Whether its bold makeup (red lips or smokey eyes) or the contrast between black clothing and bright red nails, I love it all!  Introducing The Abby Skirt:
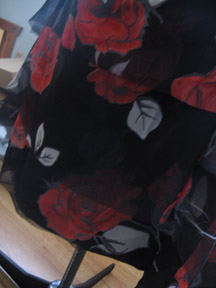
Anyways, when I was in college, I bought 9 or 10 yards (I have no idea why) of some lovely black chiffon with red flowers and a little cream and gray. The only thing I made with it was a kimono style jacket for my mom. The chiffon as been just sitting around in my fabric stash for what seems like forever and finally I have found a reason to use it up!

 *the front

 *the back

(note: I really like the skirt, but on me its just not right. I think a belt would help along with a cardigan and maybe I just went a little too crazy on gathering since it does kind of flare out along the waist.) I do think that this would be a lot of fun to layer around and its easy to make it different length and fewer layers.
Here is the page from my sketchbook that inspired the skirt:


Materials Needed:
1 1/2  to  2 yards cotton (for the underskirt)
4-5.5 yards of chiffon or other sheer lightweight fabric
2" Elastic for waistband to your waist measurement plus 1 inch *make the elastic just a little bit tight though
Thread & pins

First step is to cut all the pieces: (in bold is the general equations to find the measurements and the ones in italic are the measurements I used) I would go ahead and figure out your measurements so you can be sure of the amount of fabric you will need.

Underskirt
high waist (or desired location of where you want to wear it at) + 16"= width of your piece
37" + 16" = 53"
desired length + 1" (hem) + 1/2" (for the waist seam allowance) = length of your skirt
26" + 1" + 1/2" = 27 1/2"

Chiffon Layer 1 (this is the longest layer)
width is the same as the underskirt
53"
length is the same as the underskirt
27 1/2"

Chiffon Layer 2 (middle layer)
same width as underskirt and chiffon layer 1
53"
length: Layer 1- desired amount of space between layers
27 1/2" - 6" = 21 1/2"


Chiffon Layer 3 (the top shortest layer)
same width as underskirt, chiffon layer 1 and chiffon layer 2
53"
length: Layer 2 - desired amount of space between layers
21 1/2" - 6" = 15 1/2"

You can see here how the layers will look:
Some thoughts on deciding the distance between the layers. I wanted mine to stay below the hip line so I measured the distance between the length of the underskirt and where I would like the top layer (layer 3) to end and then found the midpoint of that measurement (that becomes layer 2). You can really customize this skirt for any season and if you wanted to use three layers of a non-sheer lightweight fabric you can do that and eliminate the underskirt. Alright, lets get started on the center back....

Finish the center back seams by using the french seam technique. (all 4 pieces will be finished this way)
Take fabric and place wrong sides together and sew with a 1/2" seam allowance back stitching at each end.

 Trim seam allowance to 1/4".

Press seam allowance to one side.

Turn piece so the right sides are together. 

Sew with a 1/2" seam allowance encasing the raw edges of the seam allowance. Repeat with remaining three pieces. 

Finish the hem of the underskirt by folding up 1/2", press, fold another 1/2" and stitch along the top edge of the fold. 

To finish the chiffon bottom edges either do a narrow rolled hem using your sewing machine and narrow rolled hem foot or by doing it on a serger. 

Once all of your hems are finished up run a gathering stitch 1/4" away from the top edge on all for pieces. (to create the gathering stitch set your machine on the longest stitch length and the tension on a high number)

 Take your elastic and fold in half matching the raw edges. Sew with a 1/2" seam allowance *I used a stretch straight stitch on my machine.

Then finger press the seam allowance open.

Sew down the seam allowance on each side. *I used a stretch zig-zag stitch. 

Next place the layers in the following order matching the top seams and the center back seams *starting from the inside to the out: underskirt (right side facing out), chiffon layer 1 (right side facing out), chiffon layer 2 (right side facing out), chiffon layer 3 (right side facing out), and the elastic waist band with the right side facing chiffon layer 3. Pin a the center back, center front, and sides. Ease the skirt into the rest of the elastic and pin. 

Sew with a 1/2" seam allowance back stitching at each end around the skirt. Make sure to sew all four layers. Overlock or zig-zag stitch the raw edge. Fold the waist band up and check to see if any of the gathering stitches are showing (if they are you can pull them out). The skirt is ready to wear!

8.30.2010

The Sketchbook Projects: Trend:Lace

I'm really excited to start a new weekly feature every Monday here on the blog. The Sketchbook Projects are going to be a mix of fashion, styling, sewing, tutorials, etc.  Each week, I will be sharing a page from my sketchbook along with a tutorial that was created/inspired by that page in the sketchbook. 

So for the first set of projects I am going to focus on my favorite time of the year Fall fashion. Seriously, I can't wait to get my hands on all the September fashion issues out there (Vogue, W, Lucky, Bazaar, etc). When I was flipping through a few of the issues one of the trends that I noticed was lace. In general I am not a huge lace fan (seems way to girly usually to me), but for some reason it is starting to wear on me. I thought it would be fun to try and add a little bit of the lace trend to my fall wardrobe (without a huge money or time commitment). Also for the past few seasons: the whole wearing socks/tights with wedges or open-toed shoes in the cooler months has been in (I really love this trend and for me it never really seems to go out of style). So I thought it would be fun to mix the two (and try out the lace trend and see how I like it)...


Here is a look at the page in my sketchbook that inspired these socks (plus a few more projects that will probably never get done, but that are fun to think about):

For materials:
*I picked up the knee-highs at the dollar store, but I probably had some hiding in the drawer somewhere...

Step 1: 
Start by laying the socks so the toes are facing opposite directions (as shown in the photo above) and measure the top of the sock for width and to get and idea of the length desired for the lace. (mine turned out to be 2 1/2" wide x 3" long) 

Step 2: 
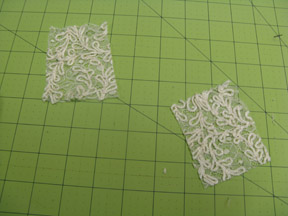
Cut out the lace to desired measurements (2 1/2" x 3" in this case). I am just using some scrap lace with an allover pattern and cut it into a rectangle. 

Step 3:
Check to see if you like the lace (remember to keep your socks with the toes facing opposite directions) *you can always layer lace and/or wrap it around more of the socks, in this case I am just adding to the sides

Step 4:
To make the lace look a little more "natural" cut around the lace to give it some shape (look at the top sock for an example) and repeat with the other piece of lace. 

Step 5:

Pin the lace to the top of the sock (only pin through the top layer ) and thread a needle with thread that matches the color of your lace.

Step 6:

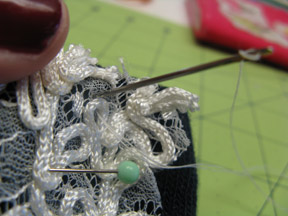
Start by sewing the lace to the sock. Just start by taking the needle up through the back to the front  (make sure you have a nice knot at the end of your thread and I did double up my thread)

Step 7:

And then sew back tacking down part of the lace (the lace will be loosely tacked down and with washing will kind of curl up and add a little texture) 

Step 8:
It's easier to do a little bit of a long running stitch to assist with the ease of sewing the lace down. (the thread will be easily seen inside the sock but since it is next to your skin it won't be visible).

Step 9:

repeat with the other sock (make sure that the toes are still facing opposite directions)

Step 10: 

Add decorative buttons- here were some of the options I was playing with. I went with the last option because I thought it would go best with a pair of brown wedges that I had, but I really loved the mis-matched red buttons as well.

Here's some more photos of the socks in action: