


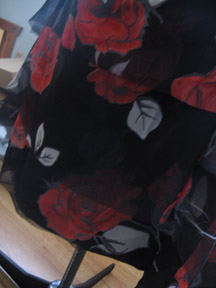
*the front

*the back
Here is the page from my sketchbook that inspired the skirt:

Materials Needed:
1 1/2 to 2 yards cotton (for the underskirt)
4-5.5 yards of chiffon or other sheer lightweight fabric
2" Elastic for waistband to your waist measurement plus 1 inch *make the elastic just a little bit tight though
Thread & pins
First step is to cut all the pieces: (in bold is the general equations to find the measurements and the ones in italic are the measurements I used) I would go ahead and figure out your measurements so you can be sure of the amount of fabric you will need.
Underskirt
high waist (or desired location of where you want to wear it at) + 16"= width of your piece
37" + 16" = 53"
desired length + 1" (hem) + 1/2" (for the waist seam allowance) = length of your skirt
26" + 1" + 1/2" = 27 1/2"
Chiffon Layer 1 (this is the longest layer)
width is the same as the underskirt
53"
length is the same as the underskirt
27 1/2"
Chiffon Layer 2 (middle layer)
same width as underskirt and chiffon layer 1
53"
length: Layer 1- desired amount of space between layers
27 1/2" - 6" = 21 1/2"
Chiffon Layer 3 (the top shortest layer)
same width as underskirt, chiffon layer 1 and chiffon layer 2
53"
length: Layer 2 - desired amount of space between layers
21 1/2" - 6" = 15 1/2"
You can see here how the layers will look:
Some thoughts on deciding the distance between the layers. I wanted mine to stay below the hip line so I measured the distance between the length of the underskirt and where I would like the top layer (layer 3) to end and then found the midpoint of that measurement (that becomes layer 2). You can really customize this skirt for any season and if you wanted to use three layers of a non-sheer lightweight fabric you can do that and eliminate the underskirt. Alright, lets get started on the center back....
Finish the center back seams by using the french seam technique. (all 4 pieces will be finished this way)

Take fabric and place wrong sides together and sew with a 1/2" seam allowance back stitching at each end.

Trim seam allowance to 1/4".

Press seam allowance to one side.

Turn piece so the right sides are together.

Sew with a 1/2" seam allowance encasing the raw edges of the seam allowance. Repeat with remaining three pieces.

Finish the hem of the underskirt by folding up 1/2", press, fold another 1/2" and stitch along the top edge of the fold.


To finish the chiffon bottom edges either do a narrow rolled hem using your sewing machine and narrow rolled hem foot or by doing it on a serger.

Once all of your hems are finished up run a gathering stitch 1/4" away from the top edge on all for pieces. (to create the gathering stitch set your machine on the longest stitch length and the tension on a high number)

Take your elastic and fold in half matching the raw edges. Sew with a 1/2" seam allowance *I used a stretch straight stitch on my machine.

Then finger press the seam allowance open.

Sew down the seam allowance on each side. *I used a stretch zig-zag stitch.

Next place the layers in the following order matching the top seams and the center back seams *starting from the inside to the out: underskirt (right side facing out), chiffon layer 1 (right side facing out), chiffon layer 2 (right side facing out), chiffon layer 3 (right side facing out), and the elastic waist band with the right side facing chiffon layer 3. Pin a the center back, center front, and sides. Ease the skirt into the rest of the elastic and pin.

Sew with a 1/2" seam allowance back stitching at each end around the skirt. Make sure to sew all four layers. Overlock or zig-zag stitch the raw edge. Fold the waist band up and check to see if any of the gathering stitches are showing (if they are you can pull them out). The skirt is ready to wear!
No comments:
Post a Comment